Getting started with the API/CLI
This page explains:
- How to generate project and admin API keys
- How to install the
debugbearnode module - How to find page IDs
Generating an API key
Project API keys
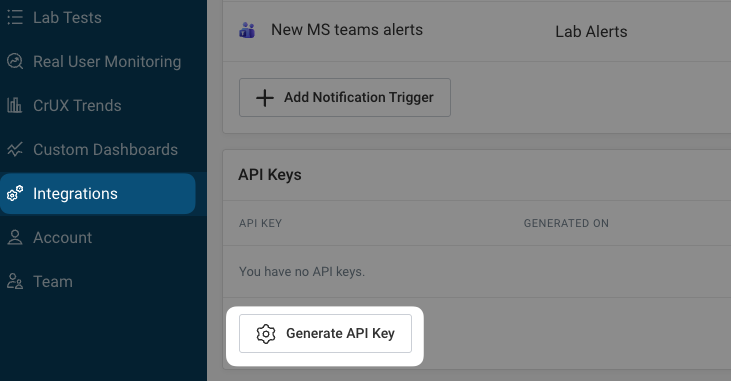
Use a project API key to trigger page tests, run quick tests, or retrieve monitoring data.
You can generate a key in the Integrations sidebar tab. Look for the API Keys heading on the page.
Admin API keys
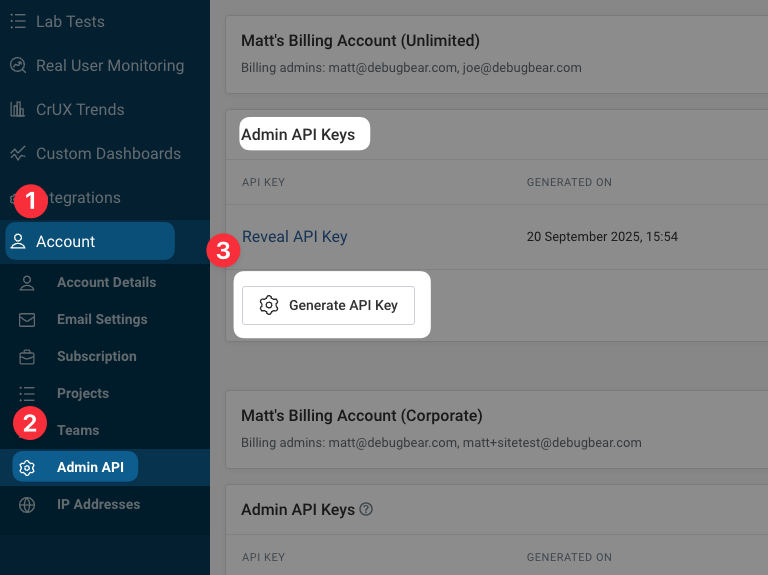
Use an admin API key to set up pages for monitoring and manage projects. It also grants access to all projects to run tests and retrieve results.
You can generate an admin API key in your account settings.
You need to be an admin for your organization to be able to generate the key.
API key permissions
API keys can have full access or read-only access. Read-only API keys cannot trigger tests (including quick tests) or create projects, pages, or annotations.
How to make API requests
There are three ways to use the DebugBear API:
- Making an HTTP request directly with an
x-api-keyheader - Using the command line interface from the
debugbearNPM module - Using the Node API from the
debugbearNPM module
Install debugbear from NPM
You can either make HTTP requests directly or use the debugbear command-line interface (CLI) and Node module.
Run this in the terminal to globally install the CLI:
npm install -g debugbear
Or, if you are using the Node API, install debugbear in your local node_modules:
npm install debugbear --save-dev
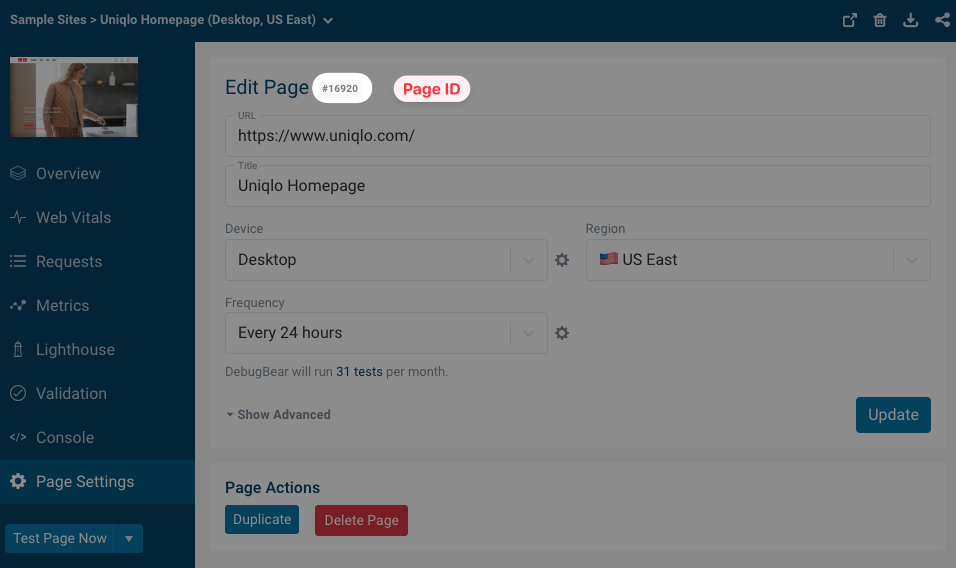
Finding the page ID
To identify the page you want to test, you need to pass in a pageId argument.
You can find this ID at the top of the Page Settings tab.